GlassFlow for ClickHouse ETL Documentation
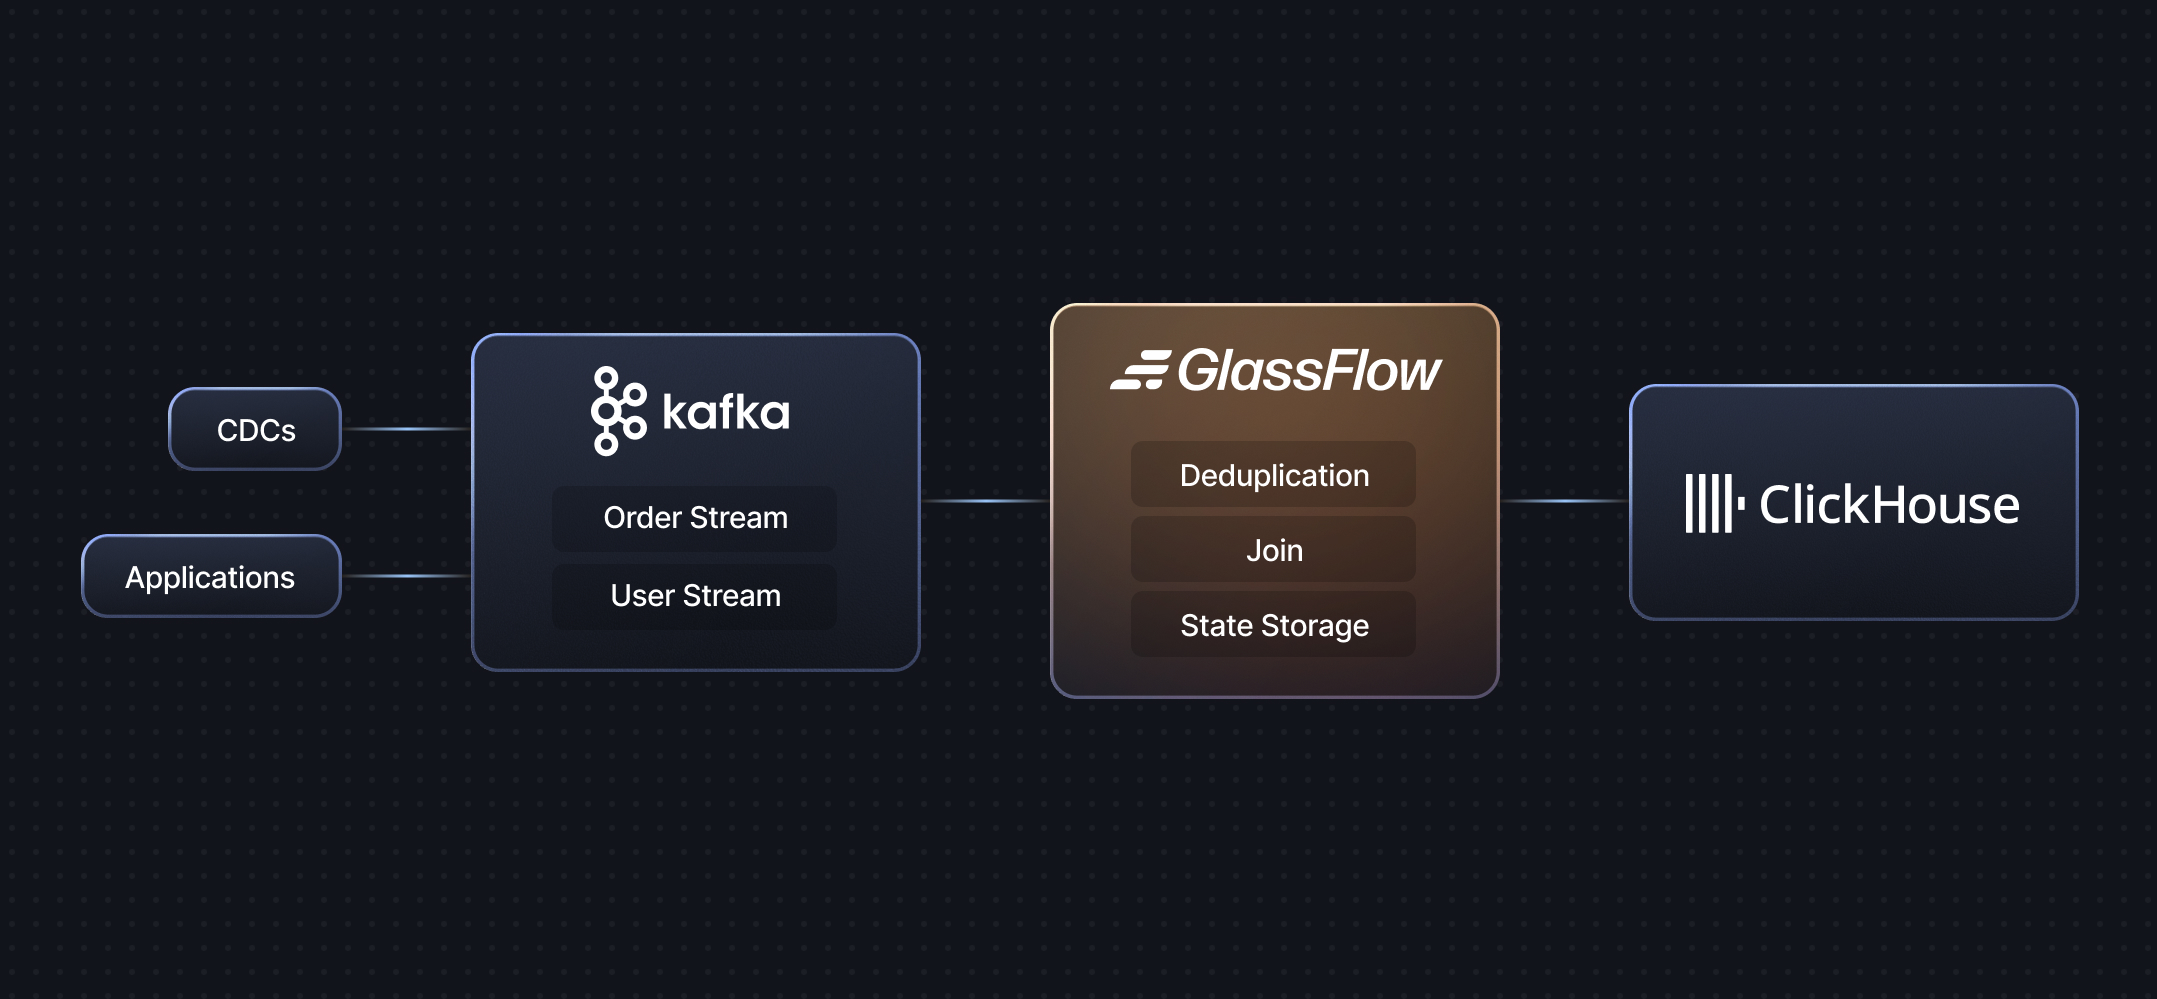
GlassFlow is an open-source streaming ETL for Kafka to Clickhouse streams. It has built-in deduplication, temporal joins, handles late-arriving events with exactly-once guarantees, and scales for high-throughput low-latency workloads on ClickHouse. It reduces the need to use ReplacingMergeTree, FINAL and Joins on ClickHouse.
Getting Started
- Getting Started - Learn about GlassFlow with our demos
- Installation - Install GlassFlow
- Usage Guide - Learn how to create and manage data pipelines with GlassFlow
Features
Streaming Deduplication
- Real-time deduplication of Kafka streams before ingestion into ClickHouse (Deduplication)
- Configurable time windows up to 7 days for deduplication
- Simple configuration of deduplication keys and time windows
- Prevents duplicate data from reaching ClickHouse
Temporal Stream Joins
- Join two Kafka streams in real-time (Join)
- Configurable time windows up to 7 days for stream joins
- Configure join keys and time windows through the UI
- Simplified join setup process
- Produce joined streams ready for ClickHouse ingestion
Filter
- Expression-based filtering to drop unwanted events before they reach downstream processing (Filter)
- Configure filter expressions at the pipeline level; events that match the expression are dropped, non-matching events continue through the pipeline
- Uses the expr language for type-safe, field-based conditions
Stateless Transformations
- Reshape event payloads with expression-based field mappings (Stateless transformations)
- Normalize fields, derive new fields, and map nested JSON to a flat schema
- Each event transformed independently—no stored state; rich expression language with built-in helpers
Kubernetes Native Architecture
- Robust and scalable architecture natively built for Kubernetes (Architecture)
- Easy installation using Helm
- Custom Kubernetes controller for managing pipelines
- Horizontal scalability
Built-in Kafka Connector
- Automatic data extraction from Kafka topics (Supported Kafka connections)
- Seamless integration with Kafka clusters
- No manual data pulling required
- Supports multiple Kafka topics and partitions
- Native support for JSON data types including nested JSON and arrays
Optimized ClickHouse Sink
- Native ClickHouse connection for maximum performance
- Configurable batch sizes for efficient data ingestion
- Adjustable wait times for optimal throughput
- Built-in retry mechanisms
- Automatic schema detection and management
- Full support for JSON data types in ClickHouse including nested JSON and arrays
Additional Features
- User-Friendly Interface: Web-based UI for pipeline configuration and management
- SDK Support: Python SDK for programmatic management of pipelines
- Local Development: Includes demo setup with local Kafka and ClickHouse instances
- Self-Hosted: Open-source solution that can be self-hosted in your infrastructure
Support
Last updated on